Brushed chrome sockets: a complete buying guide
18 June 2026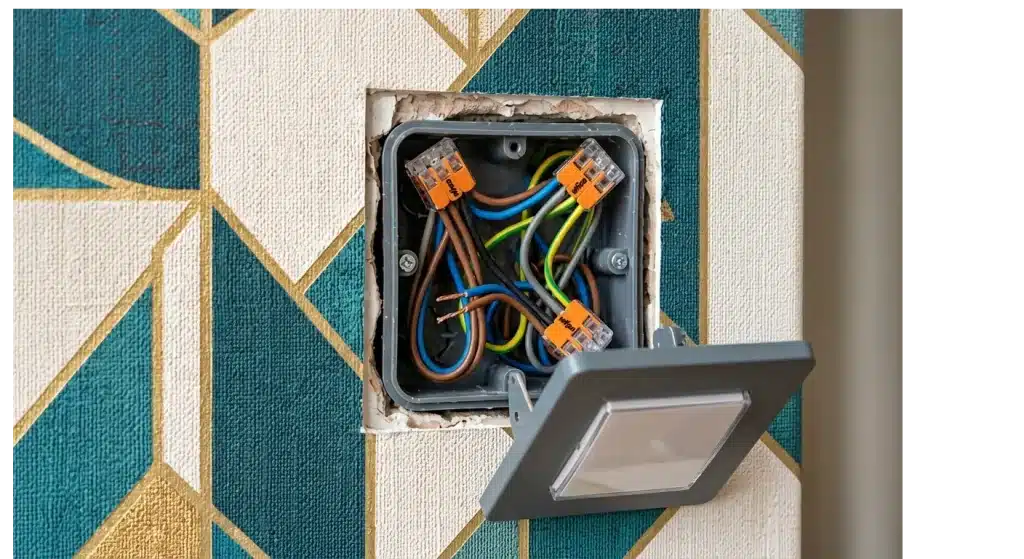
Luxury light switches bring weight, precision and a distinct aesthetic presence. They also demand discipline at the outset: solid brass switch plates can weigh between 400 and 600 grams per gang, while older wiring and compact wall cavities often call for closer inspection before the first screw is loosened.
The distinction lies in setting out the right safety precautions early: checking the electrical box, reviewing the existing switch, and confirming that the electrical system can accept the new plate without compromise.

Safety first: what to do before touching any switch plate
Cutting power and verifying voltage safely
Before any switch plate is removed, turn off power at the circuit breaker serving that circuit.
Once the breaker is off, use a tester at the electrical box to verify that no live current remains. A non-contact tester gives an initial indication, while a multimeter set to AC voltage should be used to double-check every terminal and all likely wire combinations before any connections are disturbed.
- Circuit breaker isolation Locate the correct breaker, switch it off, and label it clearly to ensure safety during the work.
- Non-contact voltage tester Test each wire inside the electrical box; if the tester responds, power is still present and the correct circuit breaker has not yet been isolated.
- Multimeter confirmation Verify zero voltage across all relevant points before attempting to remove the existing switch or loosen any terminal screw.
Because older consumer units are not always labelled accurately, it is essential to double-check after isolation rather than rely on assumption. A photograph of the wiring connections before disconnecting anything will also help preserve the original layout, particularly where several switches share the same box.
Beyond this, insulated gloves and eye protection remain sensible items of protective equipment to have on hand. Brass is conductive and substantial in weight, so a loose plate near a live terminal in an incompletely isolated circuit can create an immediate fault.
Tools and protective equipment you will need
Once the circuit has been made safe, the right tools determine the quality of the result. Precision terminals in luxury light switches require clean preparation: poorly stripped conductors, damaged screw heads or improvised tools can weaken connections and diminish the finished plate alignment.
Worth specifying here is the core kit: precision terminals and decorative finishes alike depend on clean preparation at every stage.
- Wire stripper Used to remove insulation neatly from each wire without scoring the copper and compromising the connection.
- Insulated screwdrivers Flat-head and Phillips types are typically needed for terminal fixings and plate mounting screws.
- Electrical tape Helpful for reinforcing completed wiring connections and reducing the risk of accidental contact inside the electrical box.
- Voltage tester and multimeter These remain essential throughout the job, not only at the beginning.
- Flashlight and container A light improves visibility in recessed boxes, while a small tray keeps each screw and fixing safely together.
Provided that compliance with current UK wiring regulations is maintained, the installation can proceed with confidence. Where unfamiliar switch layouts, smart modules or uncertain connections appear, where doubt remains, the correct course is to stop and appoint a qualified electrician.
Assessing wall depth for heavy brass plate installations
That same discipline applies to the wall itself. Solid brass plates place greater demands on the electrical box and surrounding structure than lightweight plastic switches, and a two-gang plate can approach 1,200 grams once fitted.
The right choice when specifying heavier models is to assess fixing strength and wall depth before purchase. If the box is too shallow for the mechanism, or if the substrate cannot support the plate securely, extra remedial work may be needed and the decorated surface may suffer when the switch is installed.
Luxury switches with dimmer modules or USB charging functions often require more space behind the plate.
Which wires go where on a luxury light switch plate
Correct wire identification is the foundation of a successful installation. On a finely made switch plate, where brass terminals are cut to tighter tolerances, each wire must be cleanly prepared and seated fully in the correct terminal. Errors at this stage tend to surface only after the plate is fitted, when faults become far harder to trace.
Identifying live, neutral and earth wires in UK installations
Correct wire identification in UK properties carries an added layer of complexity: cable colours changed with the 2004 harmonisation, so confirming the system before any wiring begins is essential. Brown denotes the live conductor in modern installations, while older systems may use red; blue marks neutral today, whereas black may appear in earlier wiring; the earth conductor is green and yellow, or bare copper.
- Live wire (brown or red) connects to the brass or gold terminal screw on the switch mechanism and carries current from the supply.
- Neutral (blue or black) connects to the silver terminal and returns current to the supply once the circuit is closed.
- Earth wire (green/yellow or bare copper) fixes to the earthing screw and provides the protective fault path.
- Multimeter continuity test confirms function in older properties where colours are faded or non-standard, before final connections are made.
Once identified, the existing switch should be recorded before a single wire is disturbed. Photograph the existing layout from several angles before disturbing a wire, particularly where three or more conductors enter the back box; a small flag of electrical tape on each conductor can clarify the original arrangement where colours are unclear.
How to change a light switch with 2 or 3 wires
The recorded arrangement distinguishes a one-way circuit from a two-way configuration before a single terminal is disturbed. A two-wire setup often contains two live conductors in a loop, while a three-wire version introduces a switched return; worth specifying here: identifying the common terminal with absolute certainty is non-negotiable, since any error there prevents correct operation.
Once the functions are confirmed, each cable end should be prepared with care. A wire stripper removes roughly 10 mm of insulation cleanly; the straightened end should then be inserted fully into the terminal before the screw is tightened. Electrical tape may then be used to protect and organise the finished connections where appropriate.
Step-by-step: how to replace a light switch in the UK
Solid brass carries more weight than a standard fitting, and precision mechanisms allow little tolerance for careless handling once the plate meets marble, specialist plaster, or another refined wall finish. The distinction lies in preparation: a rushed fitting can mark the surface, strain the cable, or leave the switch visibly misaligned.
Removing the old switches safely and preparing the wiring
That need for preparation begins before the existing switch is touched. For anyone following UK requirements on how to replace a light switch properly, the first safeguard is isolation at the breaker or consumer unit, followed by careful access to the switch plate and its connections. Draw the mechanism forward gently after undoing the fixing screws, so the cable is not put under tension.
- Unscrew the switch plate: remove the decorative plate first, then the mounting screw fixings, and ease the mechanism forward without force; older switches often have very little slack in the cable.
- Photograph the wiring connections: record each terminal, each wire position, and the full layout from more than one angle before disconnecting anything.
- Label unclear conductors: where colours are faded or non-standard, mark the wire clearly so the new switch can be connected safely and accurately.
Once documented, disconnect each terminal and remove the existing switch completely. Inspect the back box for depth, condition, and firmness in the wall: a substantial switch plate in solid brass needs secure support, otherwise the finished faceplate will sit unevenly and gaps will show immediately.
Fitting and securing the new luxury plate correctly
With the box confirmed sound, the new mechanism can be wired. Make the wiring connections before seating the switch into place: connect each wire to the correct terminal, with live to the appropriate terminal, neutral where required, and the earth wire to the earthing terminal. Worth specifying here, each screw should be firm but not over-tightened, as excessive force can damage the terminal or distort the mechanism.
Once secured, fold the cable neatly back into the box. No wire should be trapped behind the faceplate, and no connection should be under strain when the plate is offered up to the wall.
Testing the switch after installation
With the mechanism in place, hold the switch plate in position and check that it sits parallel with the wall. The finish determines the result: tighten each screw gradually in turn so pressure is distributed evenly across the faceplate, since excessive tension can mark the plate, distort the mechanism, or leave the switch uneven in use.
Provided that everything is aligned, restore power at the consumer unit and test the switch. The light should respond immediately, and dimmer switches should be checked across their full range to confirm smooth operation without flicker, especially where LED fittings are involved. In practice, smart modules used when upgrading light switches also need a final functional check before the plate is fully closed, as a fault in control registration is far easier to correct while access remains open.
Choosing the right material for your luxury switch plate
Material selection for a luxury switch plate is never a decorative afterthought. It shapes mechanical performance and finish longevity, while determining whether the plate suits its setting: dry reception rooms, bathrooms, or demanding hospitality interiors.
That foundation begins with the substrate. FEDE Switch & Light sets the benchmark with solid brass at 0.080 inches thick across every component, a standard that defines how discerning specifiers assess other materials, finishes, and switches.

Why solid brass outperforms plated and zamak switches
Once the substrate is established, the distinction lies in how it behaves over time. Luxury light switches made from solid brass carry a perceptible weight and a more assured tactile response: a 0.080-inch brass switch plate weighs measurably more than a stamped zamak equivalent.
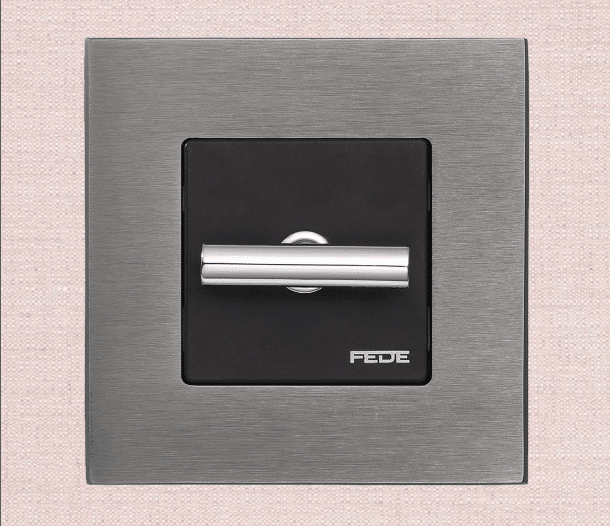
FEDE Switch & Light specifies solid brass for all plates, toggles, and rocker mechanisms, with no zinc-alloy substitution at any stage. This standard reflects the brand’s Spanish artisan manufacturing tradition, where precision and material integrity remain inseparable from the finished design.
Provided that the base metal is sound, ageing remains controlled. Solid brass develops an even patina over roughly eighteen months, whereas zamak tends to deteriorate at the edges within five years, matching the accelerated wear threshold noted in the table above.
Beyond this, alloy composition affects finish behaviour. A higher copper content creates a softer, more workable base for hand-applied finishes, while increased zinc produces a harder substrate that can influence uniformity across large multi-gang plate formats.
| Property | Solid brass | Zamak (zinc alloy) |
| Thickness standard | 0.080 inches across all components | Variable, often thinner at edges |
| Patina development | Coherent, even over 18 months | Uneven degradation at edges |
| Finish adhesion | Stable across 10,000+ operations | Chips to expose base metal |
| Expected lifespan | 20 years with consistent performance | Accelerated wear after 5 years |
| Weight per gang | 400–600 grams | Significantly lighter, less structural |
Alternative materials for bathrooms, kitchens and period properties
With brass established as the reference point, other materials become relevant where moisture, conservation rules, or a specific tactile brief shape the specification. Worth specifying here: each material answers a distinct architectural requirement rather than serving as a simple stylistic variation.
- Porcelain and ceramic are the right choice when early twentieth-century restoration or listed-property work calls for historical accuracy. Their cool, vitreous surface also suits projects where conservation criteria limit the use of contemporary materials.
- Tempered glass and acrylic serve a different architectural purpose: glass adds reflectivity and depth, often pairing well with chrome in bathrooms, while transparent acrylic allows wallpaper or decorative paint to remain visually uninterrupted behind the switches and plate.
- Machined aluminium and natural overlays extend the range further. Aluminium can be powder-coated precisely to RAL references for commercial settings. Leather, stone, and wood veneer overlays appear in high-end hospitality schemes where touch and atmosphere receive the same design attention as the lighting plan itself.
Beyond these options, solid copper deserves separate specification. It develops a reddish-brown aesthetic as it oxidises, and the finish determines whether that change is seen as enrichment or upkeep: copper suits projects where visible material evolution is intentional, not where a maintenance-free switch plate is expected.
Selecting and maintaining premium switches for lasting elegance
Material and finish choices set the visual register of a premium switch plate. Mechanism selection shapes the tactile experience at every use.
Toggle, rocker and dimmer switches: which suits your interior
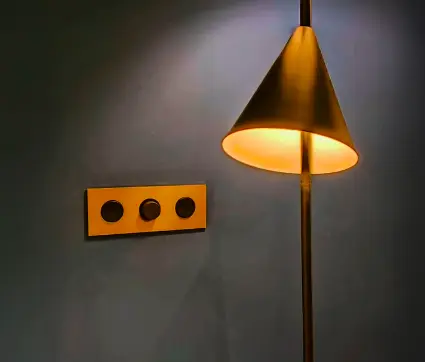
Matching the switch to the character of the room is the first decision: toggle switches suit period properties and vintage-led interiors, while rocker switches are often selected for contemporary and minimalist schemes. The right choice when planning a room is rarely stylistic alone, since daily touch defines how the plate is experienced.
- Toggle switches: specified for historical homes, period townhouses, and vintage-influenced interiors; the crisp mechanical click contributes to the sensory character of the space as much as the finish of the switch plate.
- Rocker switches: suited to contemporary European, minimalist, and urban residential projects; smooth actuation with no lateral play reflects the precision tolerances expected in a premium switch selection.
- Rotary dimmer switches: chosen where atmosphere matters as much as finish integrity, with tactile control maintained across a ten-thousand-operation lifespan.
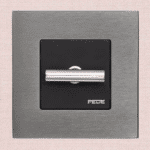
- Touch dimmer switches: specified when surface continuity is essential, since no visible mechanical components interrupt the face of the plate.
Once selected, dimmer switches intended for LED loads must be paired with LED-compatible modules to avoid flickering.
Smart switches and USB sockets in brass plate frames
FEDE Switch & Light has developed smart switches within solid brass frames to avoid the visual compromise often associated with connected hardware: Bluetooth-enabled mechanisms can link with mobile apps for scheduling and scene control, while certain premium dimmer models also incorporate hotel card technology to unify door and lighting control within one system.
Beyond this, USB sockets can be built directly into brass frames for charging without disturbing the room’s aesthetic. When matched with standard 13A plug sockets in the same finish and materials, they create a coherent wall composition across the scheme.
Long-term care and maintenance of luxury switches
A precision-made brass switch requires little more than regular cleaning with a soft, dry cloth; harsh chemicals and abrasive materials should be avoided, as they can damage lacquered surfaces and accelerate unwanted oxidation. The finish determines how the surface matures, with polished brass developing patina rather than peeling when handled and cared for properly.
Provided that care is consistent, inspections can remain simple: check for wear, loose connections, or corrosion around each wire termination point. Antique brass will continue to acquire patina through daily use, whereas lacquered finishes preserve a more uniform appearance in high-traffic areas but need prompt attention if scratched. Smart switches benefit from an app review after installation, so schedules and scenes are active from the outset.
Frequently asked questions
What are the most common mistakes when changing a light switch?
The most common errors begin with safety: failing to isolate the breaker before starting, then neglecting to confirm the circuit is dead with a tester. The same issue appears in older properties, where pre-2004 wire colours can be misread and the live, neutral or earth conductor placed on the wrong terminal. Photographing the existing switch before disconnection remains a simple safeguard.
Once the wiring has been identified, compatibility matters just as much: specifying a standard dimmer switch on an LED circuit often leads to flickering and poor performance. LED-compatible dimmer switches are required where LED lighting is installed. Over-tightening each screw is another frequent mistake, since excessive pressure can crack or permanently mark the finish of a refined brass switch plate.
Which wire goes where on a UK light switch?
In current UK installations, the brown wire is live and connects to the brass or gold terminal screw. The blue wire is neutral and connects to the silver terminal, while the earth wire, green and yellow or bare copper, fixes to the earthing terminal marked with the earth symbol. Worth specifying here: pre-2004 systems often use red for live and black for neutral, so each wire should be checked with a tester rather than assumed.
Beyond this, a two-way switch requires careful identification of the common terminal. If the correct wire is not placed there, the switches will not operate the circuit properly from either location.
Does wall type affect the installation of a heavy brass switch plate?
A solid brass switch plate can weigh between 400 and 600 grams per gang, which places greater demand on the box and fixings than a standard plastic switch. In practice, hollow partitions need particular attention if the plate is to sit flush and remain stable over time.
A wall box anchored with fixings undersized for the combined load will shift under the plate’s weight, producing misalignment and visible gaps at the surround. The same principle applies to multi-gang arrangements, especially in stud or plasterboard walls, where reinforced fixings help support the switch securely. FEDE Switch & Light, as a Spanish artisan manufacturer, treats fixing depth and plate alignment as craft decisions: a box anchored even fractionally off-centre will betray itself in the gap between plate and plaster.